

Let's have some fun with ThreeJs | Basics
Chapter 3: Experimenting with ThreeJs Primitive Shapes, Material Options, Orbital Controls and Instancing.


Introduction 🫱🏽🫲🏿
In this article, we'll mess with a bunch of ThreeJs features and try to make interesting things using purely ThreeJs.
We'll create lots of shapes, tinker with all sorts of material options to make them look a certain way, and go over some time saving optimizations!
So let's get into it!
(PS: If you just want the code, head to the Summary Section.)
Prerequisite ✔️
We went over the process of setting up ThreeJs in the last chapter, we won't go over that again here.
This is the boilerplate we're using,
<div
    style="position: fixed; top: 0; left: 0; width: 100vw; height: 100vh;"
    class="threeD-Canvas"
></div>
<script async src="https://unpkg.com/es-module-shims@1.3.6/dist/es-module-shims.js"></script>
<script type="importmap">
{
    "imports": {
        "three": "https://unpkg.com/three/build/three.module.js"
    }
}
</script>
<script type="module">
    import * as THREE from "three";

    const init = (
        targetClass = "threeD-Canvas"
    ) => {
        const target = document.getElementsByClassName(targetClass);
        if (target) {
            // Renderer and Scene Setup
            const renderer = new THREE.WebGLRenderer({ alpha: true });
            const Cwidth = () => {
                return document.getElementsByClassName(targetClass)[0].clientWidth;
            };
            const Cheight = () => {
                return document.getElementsByClassName(targetClass)[0].clientHeight;
            };
            renderer.shadowMap.enabled = false;
            renderer.setPixelRatio(window.devicePixelRatio);
            renderer.setSize(Cwidth(), Cheight());
            renderer.physicallyCorrectLights = true;
            renderer.domElement.setAttribute("id", "three-canvas");

            target[0].appendChild(renderer.domElement);
            const scene = new THREE.Scene();
            const ambientLight = new THREE.AmbientLight(0xffffff, 2);
            scene.add(ambientLight);

            // Camera Setup
            const aspect = Cwidth() / Cheight();
            const fov = 60;
            const near = 1.0;
            const far = 200.0;
            const camera = new THREE.PerspectiveCamera(fov, aspect, near, far);
            camera.position.set(0, 30, 0);
            camera.lookAt(0, 0, 0);

            // Adding Stuff to Our World
            // Add Point Light
            const light = new THREE.PointLight(
                0xffffff /* Color */,
                30 /* Intensity */,
                100 /* Maximum Range of Light */
            );
            light.position.set(30, 30, 30);
            scene.add(light);

            // Add Primitive Shapes

            // Play Animation
            const RAF = () => {
                requestAnimationFrame(() => {
                    // Animations

                    // Recursively Render
                    renderer.render(scene, camera);
                    RAF();
                });
            };

            RAF();

            // Responsiveness
            window.addEventListener(
                "resize",
                () => {
                    camera.aspect = Cwidth() / Cheight();
                    renderer.setSize(Cwidth(), Cheight());
                    camera.updateProjectionMatrix();
                },
                false
            );
        }
    };

    init();

</script>
So just copy-paste this in an html file, and you should be good to follow along.
If you want the details of setting up ThreeJs, checkout chapter 2.
Playing with a Cube 🧊
The snippets discussed here should go below the // Add Primitive Shapes in the boilerplate if you're following along (unless stated otherwise).
Naturally let's start with,
Spawning a Cube 🧊💥
Reiterating what we discussed in chapter 1,
A 3D object, called a Mesh, is made of Geometry (the shape) and Material (the texture, which is how the surface looks)
So what we'll do is create a Cube's Geometry,
const geometry = new THREE.BoxBufferGeometry(
    7, /** height */
    7, /** width */
    7  /** length */);
a Material,
const material = new THREE.MeshStandardMaterial( { color: 0x639af6 } );
and make a Mesh using those,
const cube = new THREE.Mesh( geometry, material );
And we just made a 3D cube!
Let's add it to the scene now so we can see it,
scene.add( cube );
And we have a cube now!
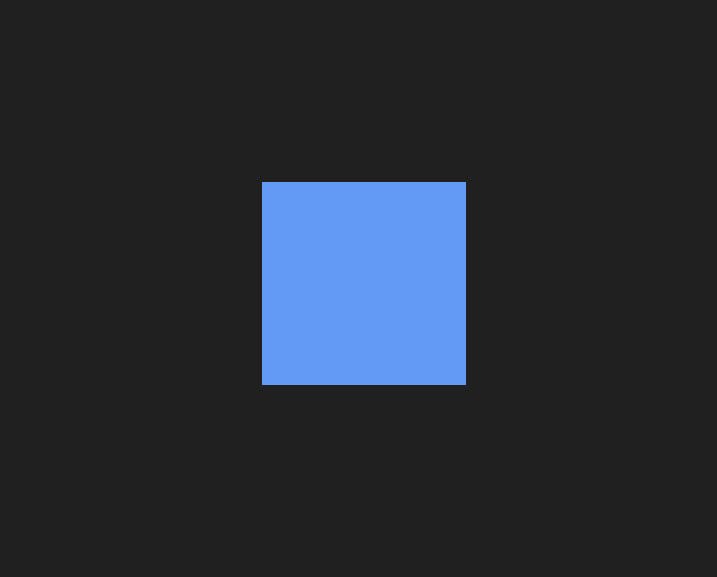
Wait... isn't that a rectangle?
Nope it's still a cube, we're just looking at it directly from the top,
Transforms 🔄
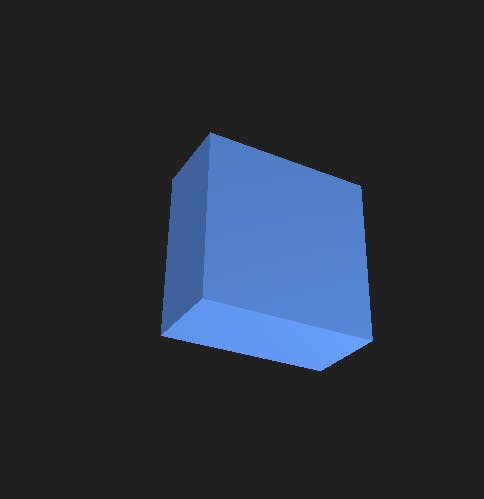
Let's rotate it a bit so it actually looks 3D,
cube.rotation.x = THREE.MathUtils.degToRad(60);
cube.rotation.y = THREE.MathUtils.degToRad(60);
Since ThreeJs uses Radians as units for angles, we had to use THREE.MathUtils.degToRad(/** Angle in Degrees */) to convert 60° into (π/3) Radians
Let's look at our cube now,
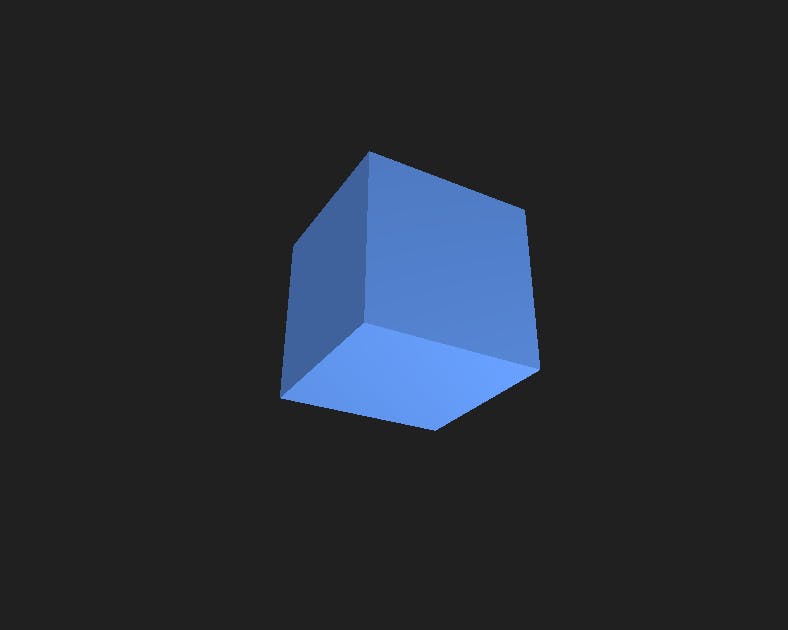
Looks much better!
As we saw, we can rotate an object simply by changing,
object.rotation.xobject.rotation.yobject.rotation.z
Similarly we change change its position by changing,
object.position.xobject.position.yobject.position.z
Or alternatively, we can do it by using functions,
like for rotation,
object.rotateX(/** Angle in Radian */)object.rotateY(/** Angle in Radian */)object.rotateZ(/** Angle in Radian */)
and for position,
object.translateX(/** Number */)object.translateY(/** Number */)object.translateZ(/** Number */)
Now keep in mind that there's some differences between the 2 methods,
Specifically,
| Comparison | object.property.x = /** Value*/; | object.changePropertyX(/** Value */); |
| Axis | Uses Global Axes | Uses Object's Axes |
| Transform | Sets object's property to the value | Increases Object's property by that value |
Test Code in // Animations Section | cube.rotation.x += 0.05; | cube.rotateX(0.05); |
| Result |  |  |
Test Code in // Animations Section | cube.position.x += 0.05; | cube.translateX(0.05); |
| Result |  |  |
So be mindful of what you want to use and when.
We can also change the object's size by changing,
object.scale.xobject.scale.yobject.scale.z
For example,
cube.scale.x = 0.5;
halves the cube along its X axis,
Now that we can easily throw our cube around, let's see if we can tinker with how it looks,
Material
We can change a range of properties in our object's material to get different results.
The general syntax would be this,
object.material.property = /** Value */;
These are some specific properties we can change,
here are some examples of how we'd go about changing these,
cube.material.color = new THREE.Color("#0f9d58");
cube.material.metalness = 0.2; /** 0 to 1*/
cube.material.roughness = 0.5; /** 0 to 1 */
cube.material.transparent = true;
cube.material.opacity = 0.3; /** 0 to 1 */
cube.material.wireframe = true;
ThreeJs has an awesome documentation that explains every property and even gives you a playground to tinker with every property with a simple GUI,
Definitely check that out here.
So we can throw our Cube around and style it in interesting ways,
Still, if it isn't interactive, it might as well be an animation right?
So let's really step into the 3rd dimension and learn to move around!
Orbital Controls
ThreeJs provides us a very helpful module to make the camera orbit around a target with click and drag.
We can import it like this,
import { OrbitControls } from "https://unpkg.com/three/examples/jsm/controls/OrbitControls";
or if you're using webpack it'd be,
import { OrbitControls } from "three/examples/jsm/controls/OrbitControls";
Now to actually use it, we need to initialize and update it,
So let's do that after the camera setup, right before // Adding Stuff to Our World,
const controls = new OrbitControls( camera, renderer.domElement );
controls.update();
And we're done! We can,
- Click and Drag to Orbit
- Shift + Click and Drag to Move
- Scroll to Zoom in and out.
Sky Full of Cubes 🌌
Okay we can do a ton of stuff with a cube now.... what about TWO cubes though, or even THREE?
What if we went even FURTHER?
First let's make a random function,
const randomIntFromInterval = (min, max) => { // min and max included
  return Math.floor(Math.random() * (max - min + 1) + min)
}
and do what we did when we first spawned a cube, except this time with random values,
const spawnRandomCube = () => {
    // Make Shape
    const size = randomIntFromInterval(2, 7);
    const geometry = new THREE.BoxBufferGeometry(
        size /** height */,
        size /** width */,
        size /** length */);
    // Make Texture
    const material = new THREE.MeshStandardMaterial({ color: 0x639af6 });
    // Make Cube
    const cube = new THREE.Mesh(geometry, material);
    // Random Position
    cube.position.set(
        randomIntFromInterval(-80, 80),
        randomIntFromInterval(-80, 80),
        randomIntFromInterval(-80, 80)
    );
    // Random Angle
    cube.rotation.set(
        THREE.MathUtils.degToRad(randomIntFromInterval(0, 90)),
        THREE.MathUtils.degToRad(randomIntFromInterval(0, 90)),
        THREE.MathUtils.degToRad(randomIntFromInterval(0, 90))
    )
    // Add to Scene
    scene.add(cube);
}
now Let's repeat it 10000 times!!
for (let i = 0; i < 10000; i++) spawnRandomCube();
This is what we get,
Something feels off though,
Let's Check on how much time takes for us to do this,
console.time("Spawning Cubes");
for (let i = 0; i < 10000; i++) spawnRandomCube();
console.timeEnd("Spawning Cubes");
The time taken should be logged in the console,

Woah... that's a lot...
It isn't really ideal that this task alone takes a fourth of a second to complete,
Can we do something to speed the process up? Any glaring optimizations we skipped over?
The problem is, we're making the same Material and Geometry over and over each time we spawn a cube,
since it's the same exact Geometry and Material, we don't necessarily need to do that,
So let's just make it once and use it anytime we need it next, like this,
// Make Texture
const material = new THREE.MeshStandardMaterial({ color: 0x639af6 });
// Make Shape
const geometry = new THREE.BoxBufferGeometry(
    1 /** height */,
    1 /** width */,
    1 /** length */);

const spawnRandomCube = () => {
    // Make Cube
    const cube = new THREE.Mesh(geometry, material);
    const scale = randomIntFromInterval(2, 7);
    cube.scale.set(scale, scale, scale)
    // Random Position
    cube.position.set(
        randomIntFromInterval(-80, 80),
        randomIntFromInterval(-80, 80),
        randomIntFromInterval(-80, 80)
    );
    // Random Angle
    cube.rotation.set(
        THREE.MathUtils.degToRad(randomIntFromInterval(0, 90)),
        THREE.MathUtils.degToRad(randomIntFromInterval(0, 90)),
        THREE.MathUtils.degToRad(randomIntFromInterval(0, 90))
    )
    scene.add(cube);
}
And just like that, we achieve a much better result!

This process of using the same Geometry and / or Material to create many similar objects is called Instancing.
This was just an example to understand how instancing works though,
ThreeJs Provides a way to use Instancing that's much more optimized than our little setup here,
We can utilize it like so,
console.time("Spawning Cubes");
// Make Texture
const material = new THREE.MeshStandardMaterial({ color: 0x639af6 });
// Make Shape
const geometry = new THREE.BoxBufferGeometry(
    1 /** height */,
    1 /** width */,
    1 /** length */);
// Creating 10000 Instanced Cubes
const InstancedCubes = new THREE.InstancedMesh(geometry, material, 10000);
// Creating helper 3D object to get matrix from
let tmp = new THREE.Object3D();
// Iterating Over All the Cubes that are Created
for (let i = 0; i < InstancedCubes.count; i++) {
    /** Transforming the helper 3D Object */
    const scale = randomIntFromInterval(2, 7);
    tmp.scale.set(scale, scale, scale);
    // Random Position
    tmp.position.set(
        randomIntFromInterval(-80, 80),
        randomIntFromInterval(-80, 80),
        randomIntFromInterval(-80, 80)
    );
    // Random Angle
    tmp.rotation.set(
        THREE.MathUtils.degToRad(randomIntFromInterval(0, 90)),
        THREE.MathUtils.degToRad(randomIntFromInterval(0, 90)),
        THREE.MathUtils.degToRad(randomIntFromInterval(0, 90))
    );
    // Updating the helper 3D Object's Matrix
    tmp.updateMatrix();
    // Setting the Cube's Matrix to the same as our helper
    InstancedCubes.setMatrixAt(i, tmp.matrix);
};
// Telling ThreeJs we just changed the matrices of the Cubes
// So it can update them sooner rather than later
InstancedCubes.instanceMatrix.needsUpdate = true;
// Adding the Instanced Cubes to the Scene
scene.add(InstancedCubes);
console.timeEnd("Spawning Cubes");
Every 3D Object has a matrix that stores its transforms, we can't directly transform Instanced Cubes, but we Can change their matrix, so that's what we did.
We got to know what the matrix was by creating an empty 3D object and transforming it as we wanted and copying its matrix.
And we get the same result as we did previously (as seen from a different angle this time),
with less than 5% of our original time,

Instancing is a method that saves both Memory and Time.
If Instancing can be utilized in your use case, there's no reason to not use it.
And that's it! We've reached the end! Hope you had fun : )
Let's go over what we learned,
Summary
So in this Article we learned,
- How to Create ThreeJs Primitive Shapes
- How to Make and Style Materials
- How to Make and Transform a 3D Object
- How to make ThreeJs interactive with Orbital Controls
- How to create a scattering of similar Objects
- What is Instancing, Why it's useful and How to use it
If we repeat what we did with Spheres, we'll get something like this,
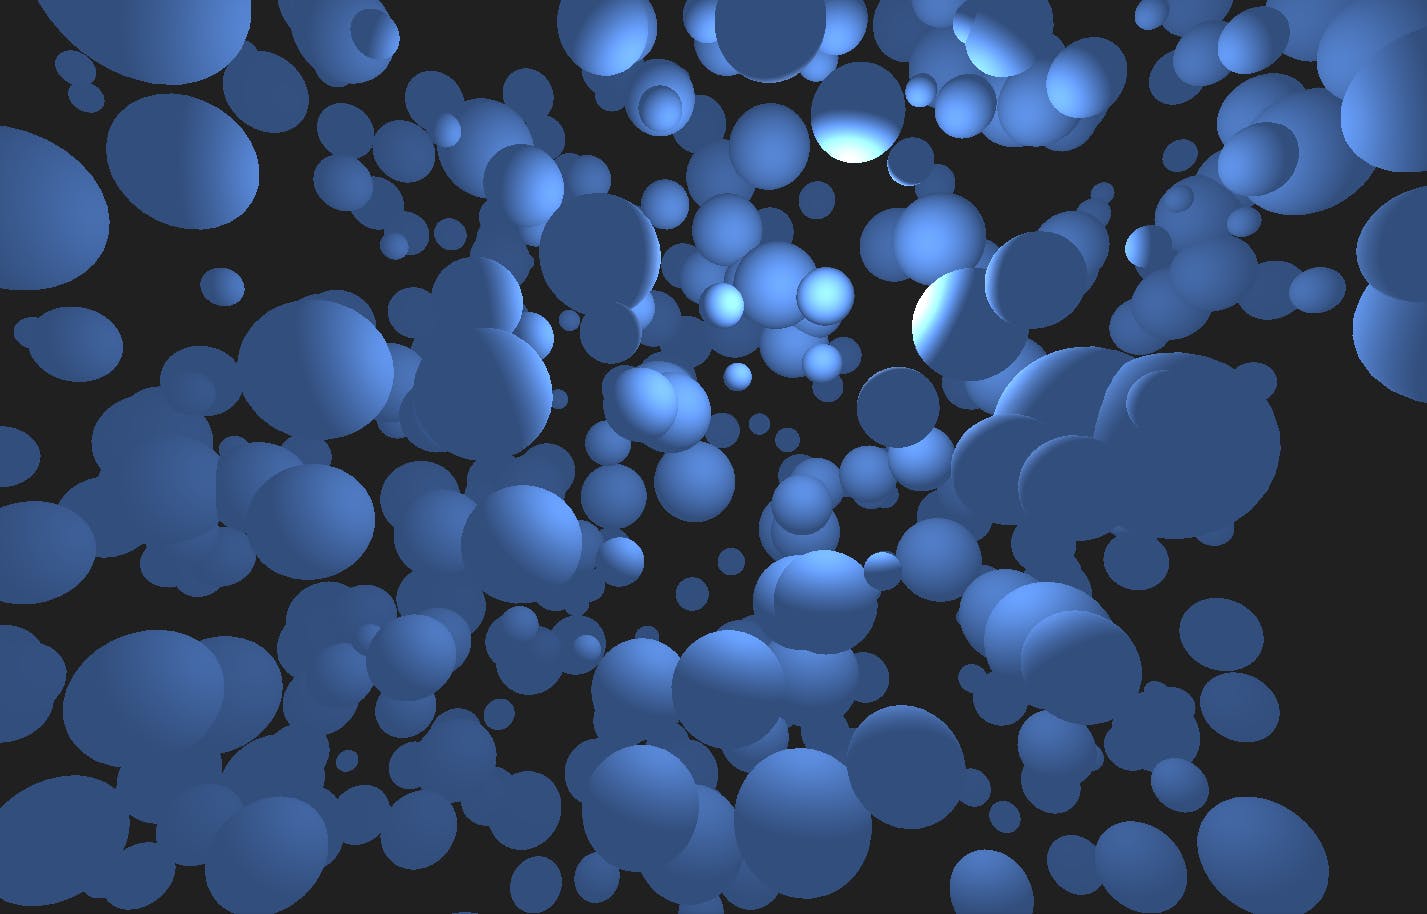
To achieve what we did above, just copy paste the following into your HTML,
<div
style="position: fixed; top: 0; left: 0; width: 100vw; height: 100vh;"
class="threeD"
></div>
<script async src="https://unpkg.com/es-module-shims@1.3.6/dist/es-module-shims.js"></script>
<script type="importmap">
{
    "imports": {
        "three": "https://unpkg.com/three/build/three.module.js"
    }
}
</script>
<script type="module">
    import * as THREE from "three";
    import { OrbitControls } from "https://unpkg.com/three/examples/jsm/controls/OrbitControls";

    const init = (
        targetClass = "threeD"
    ) => {
        const target = document.getElementsByClassName(targetClass);
        if (target) {
            // Renderer and Scene Setup
            const renderer = new THREE.WebGLRenderer({ alpha: true });
            const Cwidth = () => {
                return document.getElementsByClassName(targetClass)[0].clientWidth;
            };
            const Cheight = () => {
                return document.getElementsByClassName(targetClass)[0].clientHeight;
            };
            renderer.shadowMap.enabled = false;
            renderer.setPixelRatio(window.devicePixelRatio);
            renderer.setSize(Cwidth(), Cheight());
            renderer.physicallyCorrectLights = true;
            renderer.domElement.setAttribute("id", "three-canvas");

            target[0].appendChild(renderer.domElement);
            const scene = new THREE.Scene();
            const ambientLight = new THREE.AmbientLight(0xffffff, 2);
            scene.add(ambientLight);

            // Camera Setup
            const aspect = Cwidth() / Cheight();
            const fov = 60;
            const near = 1.0;
            const far = 200.0;
            const camera = new THREE.PerspectiveCamera(fov, aspect, near, far);
            camera.position.set(0, 30, 0);
            camera.lookAt(0, 0, 0);

            // Setting Up Orbital Controls
            const controls = new OrbitControls(camera, renderer.domElement);
            controls.update();

            // Adding Stuff to Our World
            // Add Point Light
            const light = new THREE.PointLight(
                0xffffff /* Color */,
                80 /* Intensity */,
                100 /* Maximum Range of Light */
            );
            light.position.set(30, 30, 30);
            scene.add(light);

            // Add Primitive Shapes
            const randomIntFromInterval = (min, max) => { // min and max included
                return Math.floor(Math.random() * (max - min + 1) + min)
            }

            console.time("Spawning Spheres");
            // Make Texture
            const material = new THREE.MeshStandardMaterial({
                color: 0x639af6,
                metalness: 0.2,
                roughness: 0.8,
            });
            // Make Shape
            const geometry = new THREE.SphereBufferGeometry(
                1 /** Radius */,
            );
            // Creating 500 Instanced Spheres
            const InstancedSpheres = new THREE.InstancedMesh(geometry, material, 500);
            // Creating helper 3D object to get matrix from
            let tmp = new THREE.Object3D();
            // Iterating Over All the Spheres that are Created
            for (let i = 0; i < InstancedSpheres.count; i++) {
                /** Transforming the helper 3D Object */
                const scale = randomIntFromInterval(2, 7);
                tmp.scale.set(scale, scale, scale);
                // Random Position
                tmp.position.set(
                    randomIntFromInterval(-80, 80),
                    randomIntFromInterval(-80, 80),
                    randomIntFromInterval(-80, 80)
                );
                // Random Angle
                tmp.rotation.set(
                    THREE.MathUtils.degToRad(randomIntFromInterval(0, 90)),
                    THREE.MathUtils.degToRad(randomIntFromInterval(0, 90)),
                    THREE.MathUtils.degToRad(randomIntFromInterval(0, 90))
                );
                // Updating the helper 3D Object's Matrix
                tmp.updateMatrix();
                // Setting the Sphere's Matrix to the same as our helper
                InstancedSpheres.setMatrixAt(i, tmp.matrix);
            };
            // Telling ThreeJs we just changed the matrices of the Spheres
            // So it can update them sooner rather than later
            InstancedSpheres.instanceMatrix.needsUpdate = true;
            // Adding the Instanced Spheres to the Scene
            scene.add(InstancedSpheres);
            console.timeEnd("Spawning Spheres");

            // Play Animation
            const RAF = () => {
                requestAnimationFrame(() => {
                    // Animations

                    // Recursively Render
                    renderer.render(scene, camera);
                    RAF();
                });
            };

            RAF();

            // Responsiveness
            window.addEventListener(
                "resize",
                () => {
                    camera.aspect = Cwidth() / Cheight();
                    renderer.setSize(Cwidth(), Cheight());
                    camera.updateProjectionMatrix();
                },
                false
            );
        }
    };

    init();
</script>
Conclusion
We've only worked with Cubes here, but you can go here and see a list of all the Geometries (Shapes) ThreeJs has to offer and the details on how to use them as well,
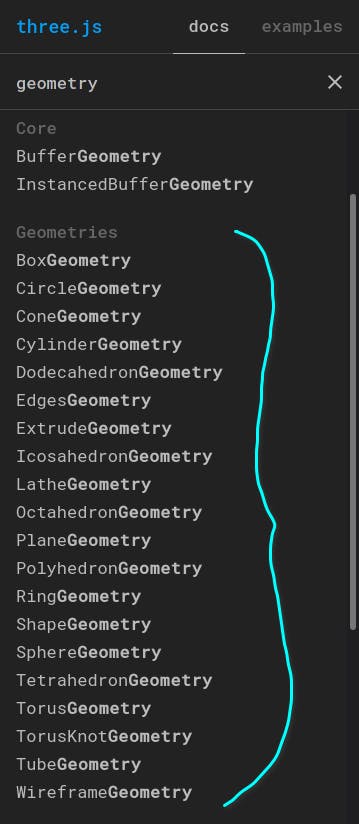
If you're using, them though, be sure to use Buffer Geometries instead of normal ones, Buffer Geometries are more optimized and you can only use instancing with Buffer Geometries.
To do that you just have to add "Buffer" between the Geometry names,
So for example, use ConeBufferGeometry instead of ConeGeometry, BoxBufferGeometry instead of BoxGeometry and so on.
Thank you so much for reading!
Our ThreeJs adventure continues in the next article, where we'll take our little setup here, and see how we can select individual spheres and make them light up like little bulbs!
So see you in ThreeJs: How to Click, I hope you learned something : )
[If you need to contact me, you can comment down below, or email me at heaust.azure@gmail.com]